

This quick tutorial will show you how to start using AceProof. We will guide you through the basic steps needed to get your translation quality assurance checks underway.
We also share our latest news, tips, and insights into quality assurance in our blog.
Find useful and informative blog posts on translation quality assurance.
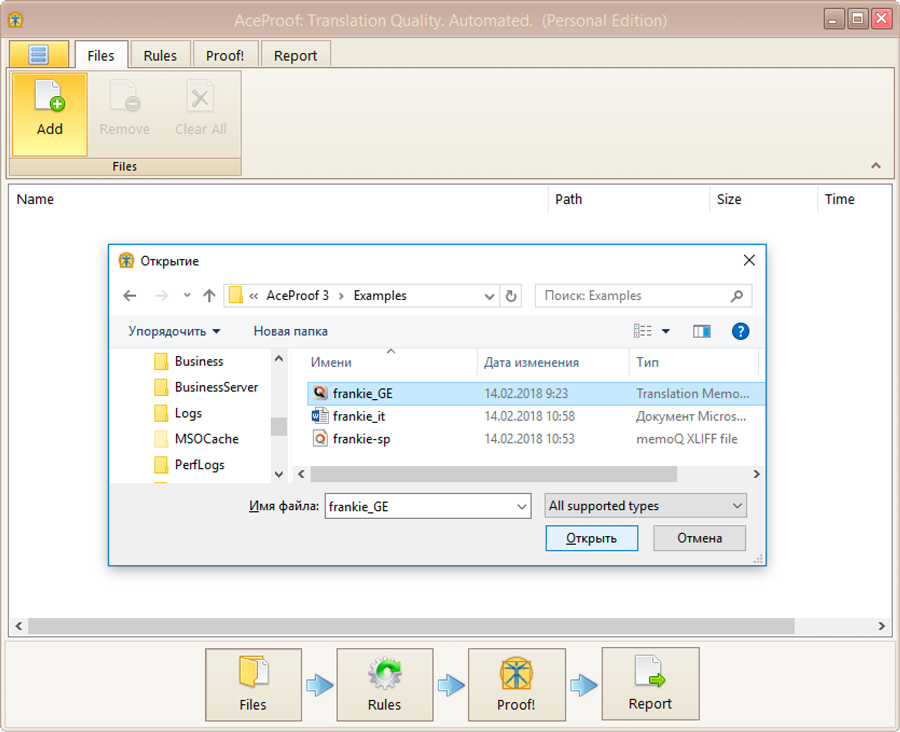
#1 Add files for translation-quality analysis
You can add files in any way convenient for you. Drag files from your desktop or another folder into the AceProof window, or click the “Add” button in the upper left corner, and select all the files you want to check.
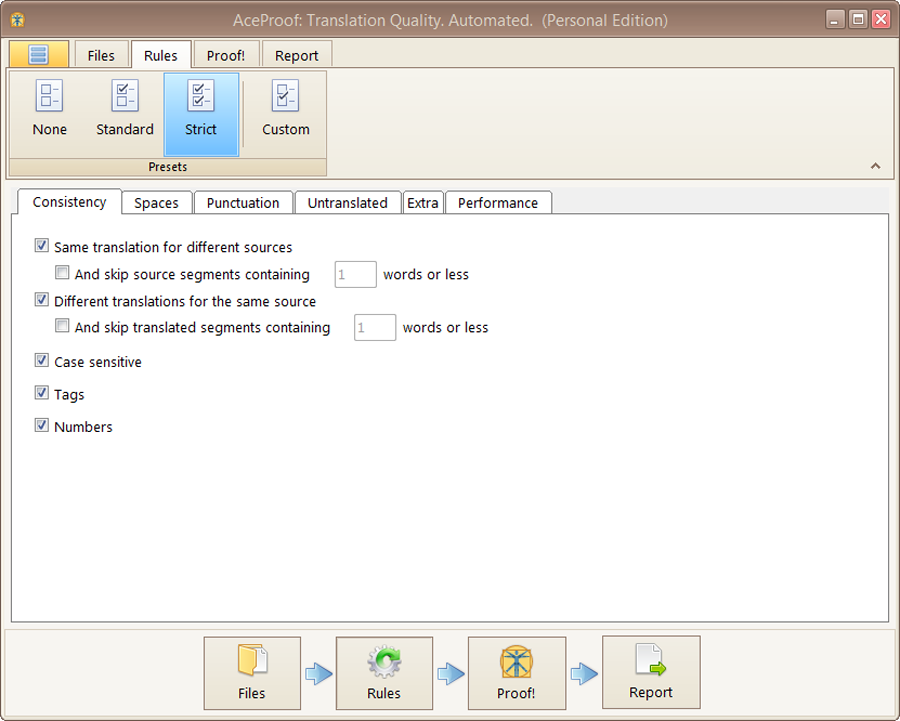
#2 Define settings
AceProof’s default profile contains standard configurations for quality checks. Moreover, you can customize the rules and select what you’d like to correct and what you’d prefer to skip.
For convenience, the settings are divided into six groups: consistency, spaces, punctuation, untranslated, extra, and performance. With the performance tab, you can enable meta translations and import locked segments. You can also enable the option to run AceProof on a multi-core CPU.
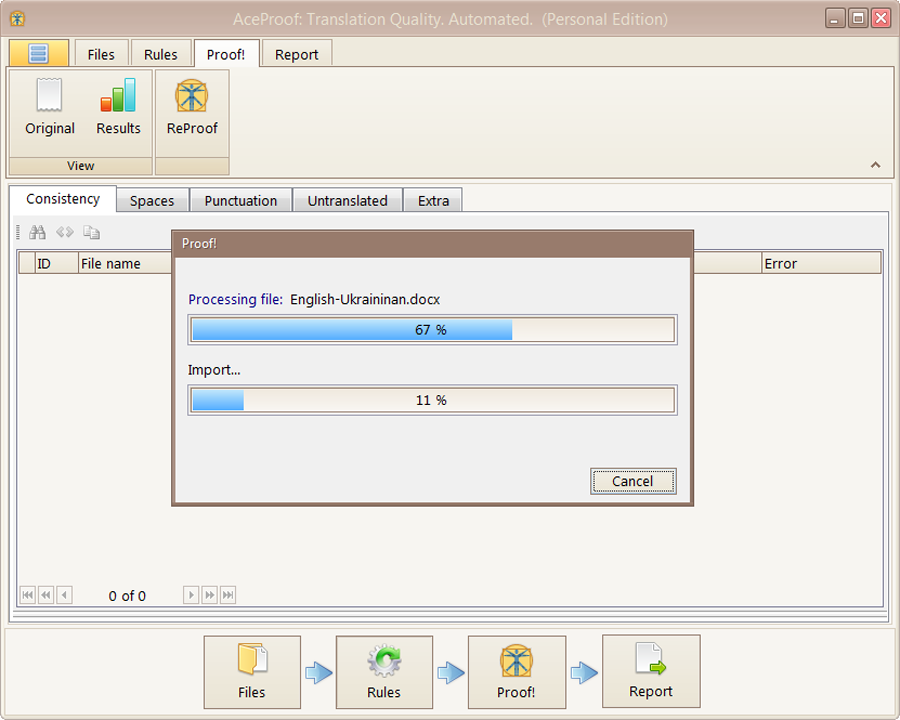
#3 Check your files
for translation errors
Just push the “Proof!” button, and the tool will do all the quality checking for you. When the analysis is complete, you can view the contents of each document, along with the analysis results.
If you want to look at the source files, you can switch between the windows for the source data and the results by clicking the buttons in the upper left corner of the “Proof!” window.
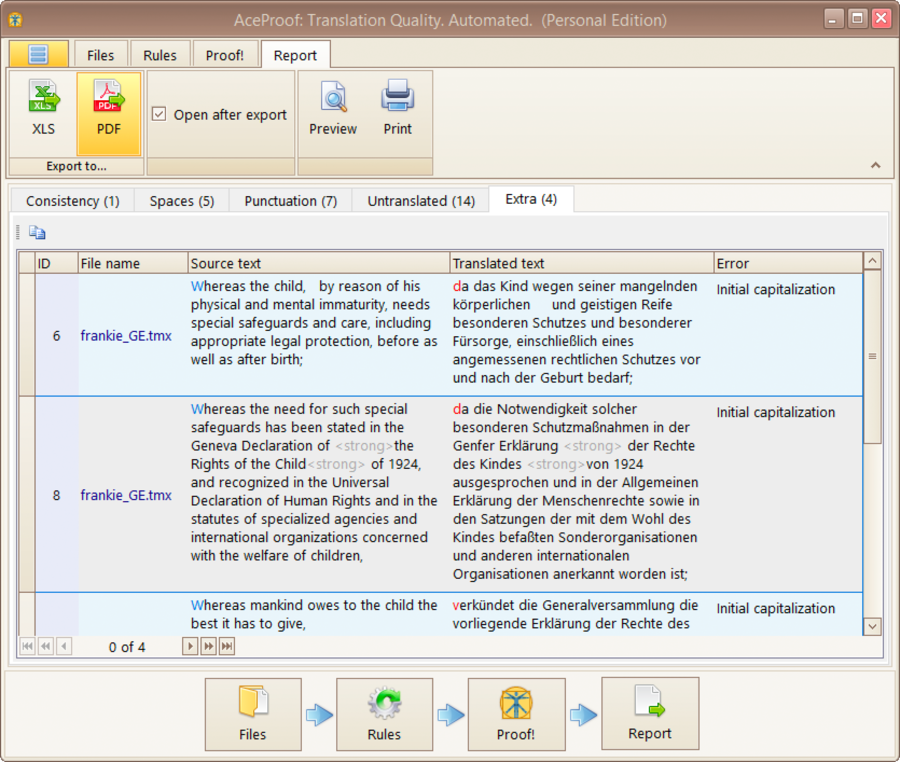
#4 Create a translation
quality report
The error analysis is divided into five groups, allowing you to apply corrections quickly. Look through the summary on your screen, and export the reports as XLSX or PDF files. Polish your translation right away, and send your client a perfect job.
Kill translation errors!
Do more with less effort using an automated translation-quality checker.